
Reviewed · ULUWATU TEMPLE & KECAK FIRE DANCE
Bali Jewelry Silver Class in Uluwatu with Gold Plating Option
Turning ideas into metal feels unreal.
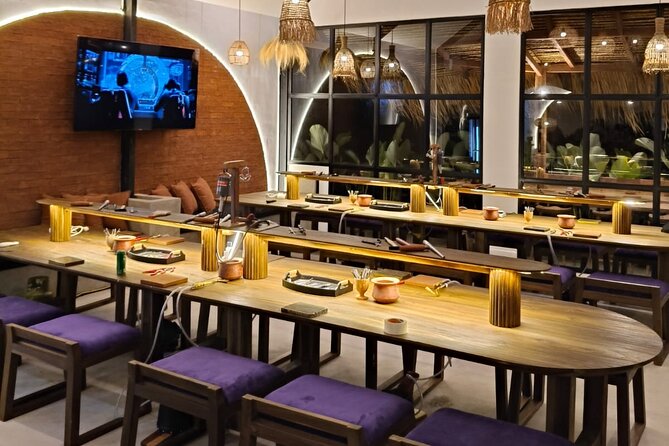
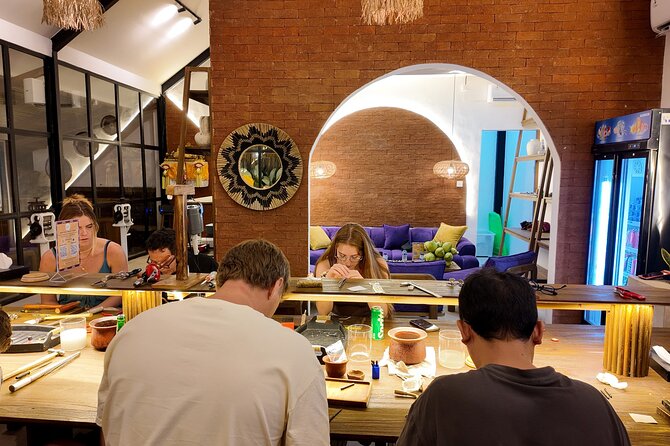
This Bali silver jewelry class in Uluwatu (Jimbaran) is a hands-on way to learn the steps behind Balinese-style crafting while you design your own piece, using 1–6 grams of pure silver. I like that you can work from your own concept or copy provided templates, and I really like that the workshop is set up with an inviting studio space (including indoor and outdoor areas) that’s genuinely photo-friendly. One thing to consider: your final piece will depend on the time and the tool set, so if you’re chasing super-advanced engraving or very complex designs, you may need to scale your plan a bit.
You’ll also be able to fit this into your trip because the class offers daytime and evening sessions, and that matters when you’re trying to balance beach time, traffic, and dinner plans. I also appreciated the practical extras like in-house Wi-Fi (so you can keep connected without worrying about roaming) and bottled water, which keeps the whole experience from feeling bare-bones. The only drawback I’d flag is simple: there’s no hotel transfer or meals included, so you’ll want to plan how you’re getting there and when you’ll eat afterward.
If you want a real Bali souvenir that’s personal (not just something you pick off a shelf), this class hits the sweet spot. The workshop runs about 2 hours, group sizes top out at 20 people, and you’ll finish with a handmade piece you can take home the same day.
In This Review
- Key things I’d watch for before you go
- Why Uluwatu is a smart place for a jewelry class
- Getting to Signature Jewelry Classes in Uluwatu
- What the 2-hour workshop feels like (and how it stays organized)
- Designing your silver jewelry: templates or your own idea
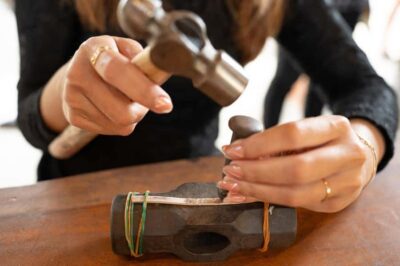
- The hands-on silversmith steps: shaping, stamping, hammering
- Gold plating upgrade: when extra money makes sense
- Group size, class timing, and fitting it into your day
- What’s included (and what you’ll need to handle)
- Value check: is $46.43 worth it?
- The best souvenir effect: why I’d do this even if I’m not a craft person
- Tips to get the best result from your 2 hours
- Who should book this class in Bali
- Should you book the Bali Jewelry Silver Class in Uluwatu?
- FAQ
- How long is the Bali Jewelry Silver Class in Uluwatu?
- Where does the class take place?
- What is included in the price?
- Can I design something myself?
- Is there an option to add gold plating?
- Do I need hotel transfer or meals?
- Are evening classes available?
- What size groups are there?
Key things I’d watch for before you go
- Pick your design level: you can bring your own idea or use templates to guide your build
- Time-flexible sessions: daytime and evening classes make scheduling easier
- 1–6 grams of silver is your canvas: plan a size that matches what you’ll be making
- You’ll use real tools: shaping, polishing, stamping, and hammering are part of the process
- Gold plating is an add-on: upgrade your piece if you want a warmer, dressier look
- Studio comfort + Wi-Fi: A/C, bottled water, and in-house Wi-Fi keep things smooth
Why Uluwatu is a smart place for a jewelry class
Uluwatu and the nearby Jimbaran area are where “Bali arts and crafts” stops being a generic label and starts feeling like part of daily life. You’re in a part of the island where creative trades are normal, and that makes the workshop more than a quick activity. You’re learning a skill that links to local craftsmanship, not just doing a tourist craft.
Also, Uluwatu is a good base area for a class because it’s easy to pair with your other plans. You can do it before dinner, after a beach break, or on a quieter day when you want something indoors (especially since the studio is air conditioned).
More clifftop Kecak nights and Uluwatu temple visits reviewed



Getting to Signature Jewelry Classes in Uluwatu
You’ll meet at Signature Jewelry Classes – Uluwatu Silver Class, Jl. Labuansait No.64, Pecatu, Kec. Kuta Sel., Kabupaten Badung, Bali 80361, Indonesia. The address is clear, and the site is described as being near public transportation, which helps if you don’t want to rely entirely on private rides.
When you arrive, you check in at the studio. There’s a waiting area that’s set up to help you settle in, and you get free Wi-Fi while you wait. I like this because it turns the “show up early and stand around” part into something useful. If you’re texting your group, checking directions, or posting a quick update, you won’t be stuck hunting for signal.
What the 2-hour workshop feels like (and how it stays organized)
The class runs about 2 hours. That time window is short enough to work as a one-afternoon (or one-evening) plan, but long enough to go through the full chain of making something real.
Here’s the rhythm you can expect:
- You get introduced to the process and how to translate your idea into metal.
- Your silversmith guides you step-by-step as you work.
- You shape, refine, and finish your piece.
- You end with the finished silver jewelry in your hands.
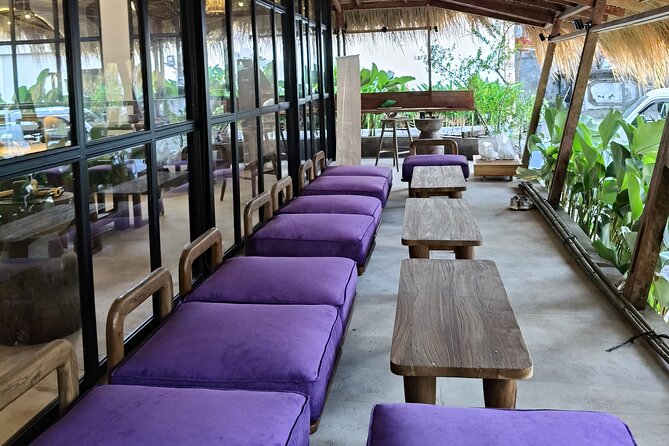
The workshop has both indoor and outdoor space, so it doesn’t feel like you’re trapped in a fluorescent box the whole time. That can matter when you’re visiting in warmer weather. And since the experience allows up to 20 people, it’s not a huge chaos-factory. You should still get guidance when you need it.
- Best Of Ubud Tours★ 5.0 · 75 reviews
- All Inclusive Sekumpul Waterfall Trekking , Handara Gate & Temple★ 5.0 · 64 reviews
- Bali’s Best Sunset: Uluwatu Kecak Dance & Dinner Jimbaran Beach★ 5.0 · 49 reviews
- Bali Private inclusive tour: Best of Ubud in a Day★ 5.0 · 48 reviews
- Bali: Melasti Beach, GWK Cultural park, Kecak, Turtle Island★ 4.8 · 46 reviews
Designing your silver jewelry: templates or your own idea
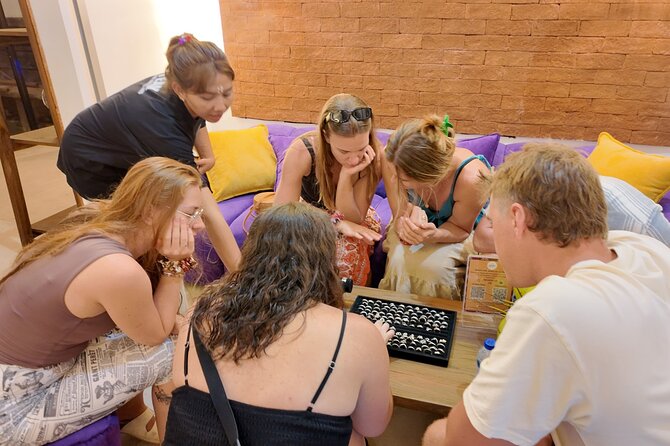
One of the best parts of this class is choice. You’re not limited to copying one exact design off a wall. You can:
- create your own design, or
- copy templates provided by the studio
That flexibility is the difference between making a souvenir that looks like everyone else’s and making something that feels like your idea. I especially like that personalization is encouraged, because it means you can aim for something wearable right away: a simple ring shape, a pendant style, or a look that matches what you actually wear at home.
You also get silver measured out as part of the class: 1–6 grams of pure silver for one jewelry design. In practice, that means you should think about size and thickness early. If your design includes lots of raised details or a bulky silhouette, you may need to simplify so the piece fits your time and your silver allocation.
The hands-on silversmith steps: shaping, stamping, hammering
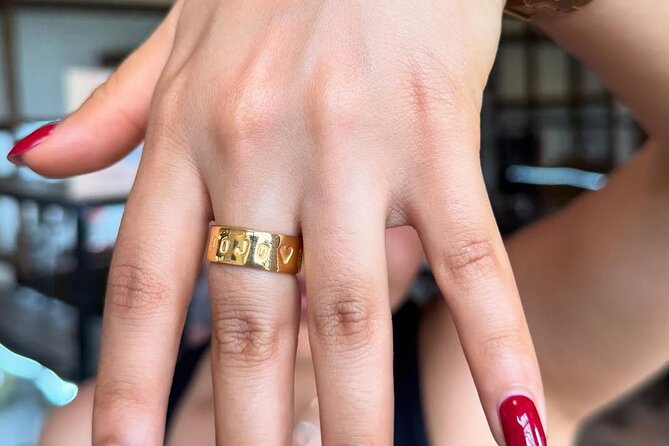
This is not a watch-and-hope class. You’ll learn the core silversmith process with professional tools. Expect a sequence that includes:
- shaping and polishing
- stamping
- hammering
- working with tools like grinding wheels and jeweler’s saws
If you’ve never used tools like that, it’s a lot of fun in a very grounded way. You learn by doing, not by memorizing. The silversmith’s guidance helps you avoid the common beginner mistakes like rushing a cut or overworking an edge.
Also, the studio setting matters here. You’re learning in an environment built for jewelry making, not in a random room. That makes the tools and workflow feel normal, which helps you stay focused on the piece rather than juggling logistics.
By the end, your handcrafted silver jewelry is yours to keep and take home. That part is what makes the class feel worth it. It turns “Bali trip activity” into an actual memory you can wear.
Gold plating upgrade: when extra money makes sense
You can upgrade your silver piece with gold plating for an additional charge. I like having that option because it lets you match the finish to your style.
When gold plating is a good idea:
- you want something that looks warmer and more dress-ready
- you’re thinking of gifting and want a more polished, premium look
- you like the idea of having a silver base with a different surface finish
When you might skip it:
- if you love the classic silver color and want the simplest keep-it-original result
- if your budget is tight and you’d rather spend on experiences outside the studio
Even with the upgrade, you’re still making the base piece yourself. So you’re not paying to have someone else do the work.
Group size, class timing, and fitting it into your day
The class supports multiple start times, including evening classes. That’s a big deal in Bali, where afternoons can get sticky and busy and evenings are often when people want to move around more comfortably.
With a maximum of 20 travelers, you’re not stuck in a classroom vibe where you only get a glance from the instructor. You’ll have time with guidance while still moving through a set workshop flow.
Duration is around 2 hours, which is realistic. It’s long enough to learn and finish, but short enough that you can plan dinner right afterward. Just remember that meals aren’t included, so you’ll want to schedule this with food in mind.
What’s included (and what you’ll need to handle)
This experience includes a lot of the “stuff that usually adds cost or hassle”:
- bottled water
- free Wi-Fi access
- an air conditioned studio environment
- 1–6 grams of pure silver for one jewelry design
- guidance from professional silversmiths
- specialized tools for jewelry making
- optional gold plating (extra charge)
Not included:
- hotel transfer
- meals
You’ll want to arrange your own ride or transportation to the meeting point. Since the activity is described as near public transportation, you have options, but the simplest plan is to book a ride based on your hotel area and timing.
For meals, I’d treat this like a workshop with a post-class appetite. If you do an evening session, plan a place to eat after your jewelry is finished so you don’t have to decide while you’re hungry.
Value check: is $46.43 worth it?
At $46.43 per person, the value comes from what’s included, not just the price tag. You’re getting:
- guided instruction through actual silversmith steps
- access to specialized tools
- silver provided for your design (1–6 grams of pure silver)
- studio comfort, bottled water, and Wi-Fi
That’s why it can feel like a bargain compared to buying a finished item. You’re paying for a skill-focused experience, plus materials, plus the guidance to actually finish a piece.
Also, this class has a 4.9 rating from 27 reviews and shows 100% recommendation based on the provided review summary. On its own that doesn’t replace your judgment, but it’s a useful signal that people consistently get what they expect: real personalization and good help during the process.
The optional gold plating is where you can adjust the total cost to match your style.
The best souvenir effect: why I’d do this even if I’m not a craft person
I think jewelry classes like this work even for people who don’t consider themselves creative. That’s because you’re not starting from scratch with blank ideas. You can use templates, and you’re guided through the steps with tools that the studio provides.
The big payoff is emotional. When you make something with your hands, it stops being a souvenir you carry and becomes something you use. In that sense, this class isn’t just about metal. It’s about getting home with a story you can wear.
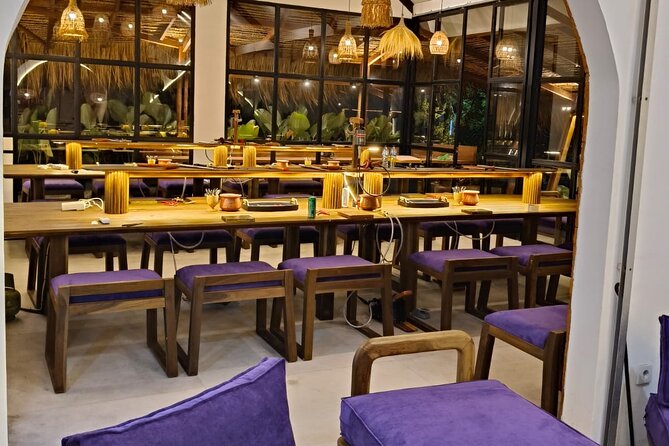
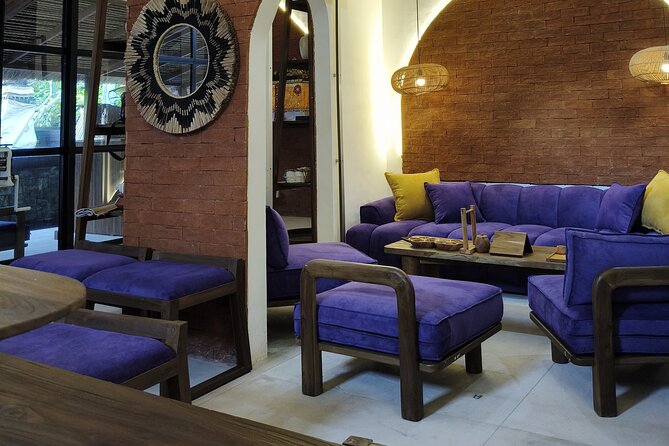
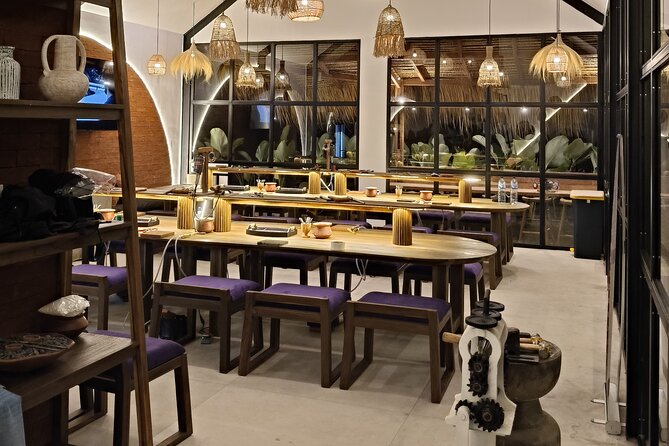
And the studio environment helps. The space is described as artistic and Instagrammable, with indoor and outdoor areas. So even if your main goal is learning, you still end up with photos that look like you actually did something, not just posed in front of a sign.
Tips to get the best result from your 2 hours
These are the small moves that help you finish strong.
- Arrive ready with a simple design idea. Even if you use a template, having a clear target helps.
- Decide early whether you want silver-only or you’ll consider the gold plating upgrade.
- Keep your expectations aligned with the silver amount (1–6 grams). That doesn’t mean you can’t make something pretty; it means size and thickness matter.
- Don’t rush the polishing or finishing stage. This is where a piece can look clean and intentional rather than rushed.
- If you’re going in the evening, plan for post-class food. Meals aren’t included.
Who should book this class in Bali
This fits best if you:
- want a hands-on Bali activity with a tangible result
- like the idea of personalizing a ring or pendant instead of buying a generic souvenir
- want a flexible schedule with daytime or evening options
- are okay handling your own transportation and meal planning
It’s also a good choice if you enjoy arts-and-crafts but want structure. You get professional tools and a process, so you’re not figuring everything out alone.
Should you book the Bali Jewelry Silver Class in Uluwatu?
I’d book it if your priority is a meaningful souvenir and a real skill you can talk about. The mix of guided silversmith work, provided silver, and optional gold plating makes the experience feel practical and customizable. Plus, the studio comfort (A/C), free Wi-Fi, and the fact that it lasts about 2 hours makes it easy to slot into a Bali itinerary.
I would hesitate only if you need a full-day activity, want meals and transfers included, or are aiming for an extremely complex multi-part design that likely doesn’t fit into a 2-hour workshop and the allocated silver amount.
If that sounds like your kind of trip, this is a solid, value-forward way to spend time in Uluwatu and leave with something you helped create.
FAQ
How long is the Bali Jewelry Silver Class in Uluwatu?
The class runs for about 2 hours (approx.).
Where does the class take place?
The meeting point is Signature Jewelry Classes – Uluwatu Silver Class, Jl. Labuansait No.64, Pecatu, Kec. Kuta Sel., Kabupaten Badung, Bali 80361, Indonesia.
What is included in the price?
The price includes bottled water, free Wi-Fi, an air conditioned studio environment, guidance from professional silversmiths, specialized tools, and 1–6 grams of pure silver for one jewelry design. Gold plating is optional and costs extra.
Can I design something myself?
Yes. You can work with your own design or copy templates.
Is there an option to add gold plating?
Yes. You can upgrade your silver piece with an optional gold plating add-on for an additional charge.
Do I need hotel transfer or meals?
No. Hotel transfer and meals are not included, so you’ll need to arrange transportation and plan food separately.
Are evening classes available?
Yes. The schedule includes daytime and evening class times.
What size groups are there?
The class has a maximum of 20 travelers.
More Bali Workshops and Classes
- Surfnesia Surf Lesson and Guiding
★ 5.0 · 46 reviews - Private Surf Lessons in Padang Padang – Uluwatu – Bali
★ 4.0 · 30 reviews - Authentic Balinese Cooking Classes
★ 4.5 · 7 reviews - Uluwatu: Surf Lessons Beginner
★ 5.0 · 3 reviews
Uluwatu Cliffs, One More Sunset
- Uluwatu Temple Entry and Kecak Fire Dance Ticket
★ 5.0 · 479 reviews - Kecak and Fire Dance Ticket at Uluwatu Temple
★ 4.0 · 222 reviews - Bali’s Best Sunset: Uluwatu Kecak Dance & Dinner Jimbaran Beach
★ 5.0 · 49 reviews - Bali: Melasti Beach, GWK Cultural park, Kecak, Turtle Island
★ 4.8 · 46 reviews - Bali Quad Bike ATV Rides in Uluwatu Experiences
★ 5.0 · 31 reviews
Fresh on the Kuta Travel pages






Uluwatu Temple & Kecak Fire Dance, compared.
 ★ 4.2Uluwatu Kecak and Fire Dance Show Entry TicketFrom $95,189 reviews
 ★ 4.2Kecak Fire Dance Show & Uluwatu Temple Entry TicketFrom $93,023 reviews
 ★ 4.9Uluwatu: Beginner & Intermediate Surf Lesson with EquipmentFrom $36832 reviews
 ★ 5.0Uluwatu Temple Entry and Kecak Fire Dance TicketFrom $29479 reviews
 ★ 4.2Skip-the-line Uluwatu Temple and Kecak Fire Dance TourFrom $27466 reviews
 ★ 4.7Uluwatu Temple Tour with Optional Kecak Dance TicketFrom $16427 reviews
 ★ 4.0Kecak Fire Dance Entry Ticket and Uluwatu TempleFrom $9406 reviews
 ★ 4.9Silver Jewelry Making Class in Kuta or UluwatuFrom $41380 reviews
Browse the lists this tour appears in